

Peeling epoxy floors plague countless Gold Coast properties because homeowners skip essential preparation steps. Surface moisture testing, proper mixing ratios, and thorough cleaning separate lasting installations from costly failures. This guide delivers practical techniques covering prerequisites, surface preparation, mixing, application, safety protocols, and troubleshooting to help you create durable, attractive epoxy flooring that withstands Queensland’s demanding climate.
Table of Contents
- Understanding Epoxy Flooring And Its Benefits
- Prerequisites: Tools, Materials, And Site Preparation
- Surface Preparation: Cleaning, Repairing, And Moisture Testing
- Mixing And Application Techniques
- Curing, Finishing, And Decorative Options
- Safety And Environmental Precautions
- Common Mistakes, Troubleshooting, And Solutions
- Expected Results, Maintenance, And Longevity
- Discover Expert Epoxy Flooring Solutions With Floor X Industries
- Frequently Asked Questions
Key takeaways
| Point | Details |
|---|---|
| Surface preparation determines success | Concrete must be clean and moisture below 4% to prevent adhesion failures |
| Precise mixing prevents defects | Use correct resin-hardener ratios with low-speed mixing to avoid bubbles and uneven curing |
| Curing time ensures durability | Allow 12-24 hours for light traffic and 7 days for full cure before heavy use |
| Safety equipment protects health | Respirators, nitrile gloves, and ventilation minimise fume exposure during application |
| Common mistakes are avoidable | 60% of DIY failures stem from poor prep, correctable through proper cleaning and moisture testing |
Understanding epoxy flooring and its benefits
Epoxy flooring consists of resin and hardener components that chemically react to form an exceptionally tough protective surface over concrete. This coating system creates a seamless, non-porous barrier that transforms worn or stained floors into durable, professional-grade surfaces.
Gold Coast properties benefit enormously from epoxy’s resistance to wear, chemicals, and moisture. Queensland’s humid subtropical climate challenges many flooring materials, but properly installed epoxy withstands moisture intrusion, temperature fluctuations, and UV exposure. Industrial warehouses, retail showrooms, and residential garages across the region rely on epoxy’s ability to handle heavy traffic whilst maintaining structural integrity.
Aesthetic versatility makes epoxy appealing beyond pure functionality. You can select from numerous colours, add decorative epoxy finishes with flakes or metallic pigments, and customise the appearance to match your property’s design. Common applications include:
- Residential garages requiring oil-resistant, easy-clean surfaces
- Commercial spaces needing professional aesthetics with minimal maintenance
- Industrial floors demanding chemical resistance and durability
- Stylish home interiors seeking modern, seamless flooring solutions
The combination of practical benefits and design flexibility explains why epoxy flooring continues growing in popularity across residential and commercial Gold Coast properties.
Prerequisites: tools, materials, and site preparation
Gathering the right equipment before starting prevents delays and ensures quality results. Essential tools include a low-speed drill mixer to blend components without introducing air bubbles, mixing buckets with volume markings, and paint rollers with 3/8-inch nap for controlled application. Personal protective equipment matters equally: respirators rated for organic vapours, nitrile gloves resistant to epoxy chemicals, and safety goggles protect against splashes.
Materials comprise epoxy resin, hardener kits matched to your project size, and optional decorative elements like coloured flakes or metallic pigments. Purchase slightly more epoxy than calculated coverage suggests to account for substrate absorption and application losses.
Site conditions directly impact installation success. The concrete must be structurally sound without crumbling edges or deep cracks requiring major repair. Gold Coast epoxy flooring preparation demands surfaces completely free of oils, grease, and contaminants that block adhesion. Moisture content below 4% is non-negotiable for preventing future peeling or bubbling.
Pro Tip: Check ambient temperature before starting. Epoxy cures best between 15-25°C, so avoid application during extreme heat or cold snaps common in Queensland’s seasonal changes.
| Tool/Material | Purpose | Specification |
|---|---|---|
| Low-speed drill mixer | Blend resin and hardener | Under 600 RPM to prevent air bubbles |
| Paint roller | Apply epoxy evenly | 3/8-inch nap for proper thickness |
| Respirator | Protect from fumes | Organic vapour cartridge rated |
| Moisture meter | Test concrete moisture | Digital meter for accuracy |
| Epoxy kit | Main coating material | Matched resin-hardener ratio |
Proper ventilation through open windows or exhaust fans removes fumes during application and curing. Set up fans to create cross-ventilation without directly blowing on wet epoxy surfaces, which can trap dust or create uneven drying.
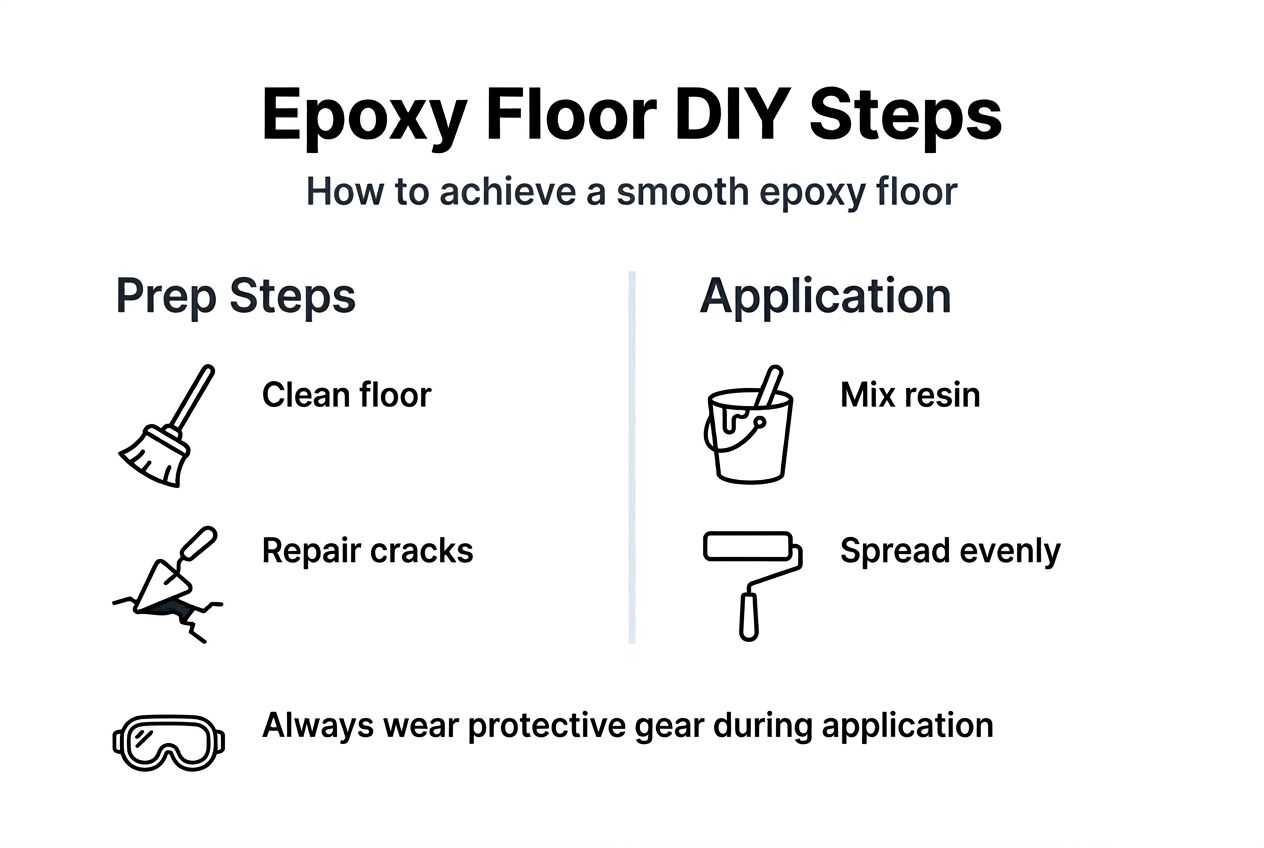
Surface preparation: cleaning, repairing, and moisture testing
Surface preparation determines whether your epoxy floor lasts years or fails within months. Start by thoroughly degreasing the concrete using commercial degreasers or trisodium phosphate solutions. Scrub aggressively with stiff brushes, paying special attention to areas where vehicles park or machinery operates. Rinse completely and allow the surface to dry.
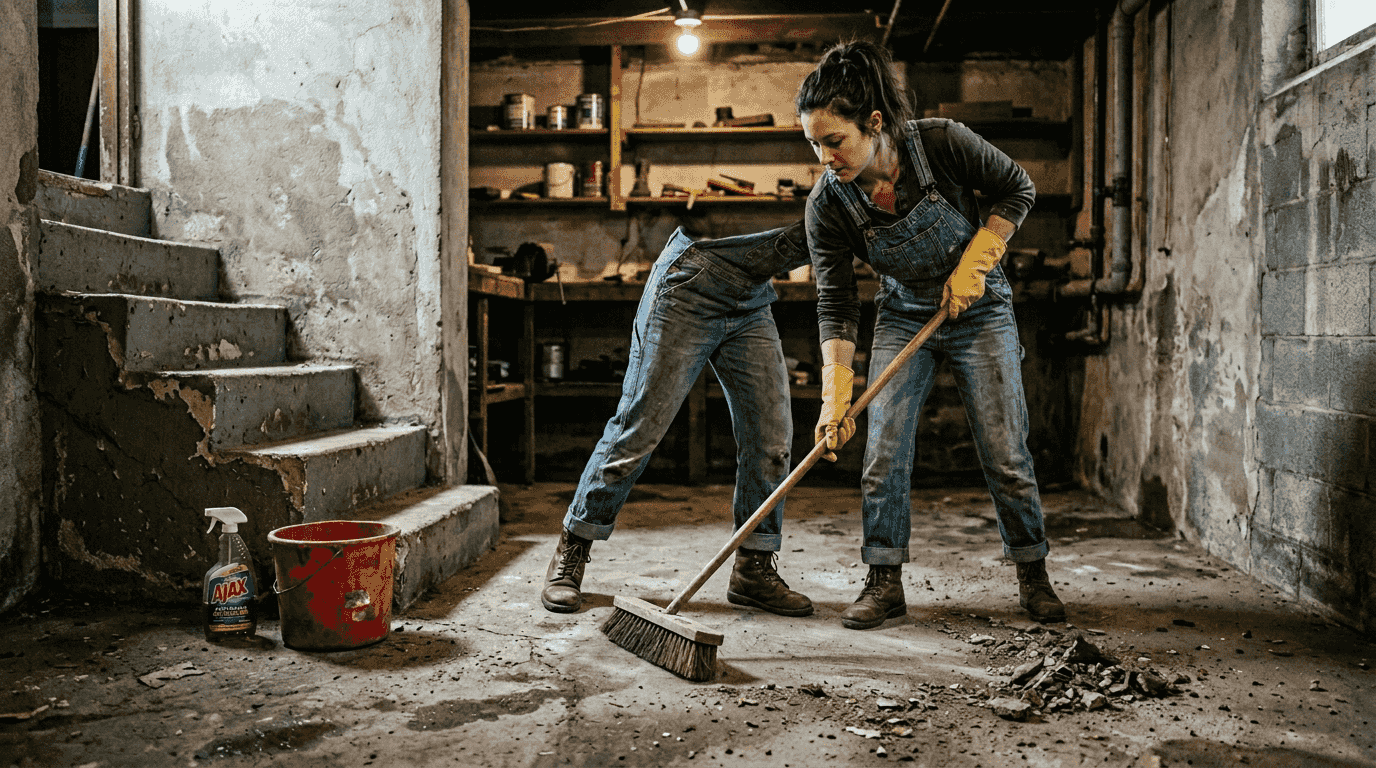
Inspect for cracks, holes, or damaged sections requiring repair. Fill small cracks with epoxy-compatible concrete fillers, smoothing them flush with the surrounding surface. Larger structural issues may need professional assessment before proceeding.
Creating proper surface texture ensures mechanical adhesion between concrete and epoxy. Grinding equipment or acid etching opens the concrete’s pores, providing the rough profile epoxy needs to grip effectively. Concrete surface preparation removes weak surface layers and contaminants whilst creating the ideal bonding texture.
- Remove all loose material, dust, and debris through thorough sweeping and vacuuming
- Degrease using appropriate chemical cleaners, scrubbing thoroughly
- Rinse completely and allow adequate drying time
- Grind or etch the surface to create texture for adhesion
- Test moisture content at multiple locations across the floor
- Vacuum again immediately before epoxy application to remove grinding dust
Moisture testing prevents the most common cause of epoxy failure. Use a digital moisture meter to check readings across the entire floor area. Concrete must be dry with moisture below 4% prior to epoxy application to prevent peeling. Test multiple spots, especially near plumbing or exterior walls where moisture intrusion occurs more frequently.
Pro Tip: Conduct the plastic sheet test overnight by taping plastic squares to the floor. Condensation underneath indicates excessive moisture requiring additional drying time or moisture mitigation strategies before applying epoxy.
Mixing and application techniques
Precise mixing determines epoxy performance. Pour the entire resin component into a clean 5-gallon bucket, then add the full hardener amount according to manufacturer specifications. Never attempt to mix partial batches, as ratio errors cause curing failures.
Use your low-speed drill mixer to blend components thoroughly. Mix for the full time specified in product instructions, typically 3-5 minutes, scraping bucket sides and bottom to incorporate all material. The mixture should appear uniform without streaks or colour variations.
If adding decorative flakes or pigments, incorporate them after achieving a homogeneous blend but before application begins. Stir gently to distribute additives evenly throughout the mixture.
- Calculate total floor area and prepare sufficient epoxy for complete coverage
- Mix resin and hardener in correct ratios using low-speed equipment
- Blend thoroughly for specified time, scraping bucket edges
- Add decorative elements if desired and mix until distributed
- Pour mixed epoxy onto prepared surface immediately
- Spread evenly using 3/8-inch nap roller with overlapping strokes
- Work quickly but carefully within the product’s pot life window
- Apply thin uniform layers rather than thick single coats
Application technique affects final appearance and durability. Pour epoxy in manageable sections, spreading with consistent roller pressure. Overlap each pass slightly to avoid lines or thin spots. Keep a wet edge by working continuously across the floor without long pauses that create demarcation lines.
Thin layers cure more uniformly and trap fewer air bubbles than thick applications. If coverage requires multiple coats, allow proper drying time between layers as specified by the manufacturer. Epoxy mixing and application tips help achieve professional results through proper techniques.
Curing, finishing, and decorative options
Patience during curing protects your investment. Initial surface hardening occurs within 12-24 hours, allowing careful foot traffic for inspections. However, full chemical cure developing maximum hardness and chemical resistance requires approximately 7 days under optimal temperature and humidity conditions.
Epoxy type influences curing characteristics and suitability for different environments. Water-based formulations offer easier cleanup and lower odour but may provide less durability in high-traffic commercial settings. Solvent-based epoxies deliver superior hardness and chemical resistance but require more ventilation and careful handling.
| Epoxy Type | Advantages | Best Applications |
|---|---|---|
| Water-based | Low odour, easy cleanup, environmentally friendly | Residential garages, light commercial use |
| Solvent-based | Maximum durability, superior chemical resistance | Industrial floors, heavy commercial traffic |
| 100% solids | Thickest coating, longest lifespan | High-performance commercial and industrial |
Decorative options transform functional flooring into design features. Coloured flakes broadcast onto wet epoxy create attractive speckled patterns whilst hiding minor surface imperfections. Metallic pigments produce stunning three-dimensional effects mimicking marble or natural stone. Decorative epoxy options showcase possibilities for residential and commercial spaces seeking distinctive aesthetics.
Final sealing after full cure protects against wear, UV exposure, and chemical damage. Polyurethane or polyaspartic topcoats add gloss whilst extending floor lifespan significantly. Queensland’s intense UV exposure makes topcoats particularly valuable for areas receiving direct sunlight through windows or doors.
- Allow minimum 12-24 hours before light foot traffic
- Wait 7 days for full cure before heavy use or vehicle traffic
- Apply protective topcoat after complete curing for enhanced durability
- Consider metallic or flake finishes for improved aesthetics and surface hiding
Safety and environmental precautions
Epoxy chemicals demand respect and proper protective measures. Resin and hardener components release fumes during mixing and application that irritate respiratory systems and cause headaches or dizziness without adequate protection. Skin contact triggers allergic reactions in some individuals, potentially causing dermatitis with repeated exposure.
Respiratory protection ranks as the most critical safety measure. Wear respirators equipped with organic vapour cartridges rated for epoxy fumes throughout mixing and application. Standard dust masks provide insufficient protection against chemical vapours.
Skin and eye protection prevents direct chemical contact. Nitrile gloves resist epoxy penetration better than latex alternatives. Safety goggles with side shields protect against splashes during mixing or pouring. Long sleeves and trousers minimise skin exposure to airborne droplets.
Ventilation removes harmful fumes from the workspace. Open all windows and doors to create cross-ventilation. Position fans to exhaust contaminated air outdoors without blowing directly onto wet epoxy surfaces. Maintain airflow throughout application and initial curing periods.
- Wear organic vapour respirators during all mixing and application activities
- Use nitrile gloves and safety goggles to prevent skin and eye contact
- Ensure continuous ventilation through open windows and exhaust fans
- Take regular breaks in fresh air to minimise cumulative exposure
- Store epoxy materials away from heat sources and open flames
- Keep children and pets away from work areas during and after application
“Proper ventilation and respiratory protection aren’t optional safety measures for epoxy application. They’re essential requirements that protect your health during and after installation, particularly in enclosed spaces where fume concentration builds rapidly.”
Common mistakes, troubleshooting, and solutions
DIY epoxy failures follow predictable patterns. Poor surface preparation causes 60% of DIY adhesion failures, manifesting as peeling, blistering, or delamination within months. Concrete contaminated with oils, insufficient moisture testing, or inadequate surface profiling prevents proper bonding between substrate and coating.
Mixing errors create curing problems ranging from soft spots that never fully harden to brittle sections prone to cracking. Incorrect resin-hardener ratios or high-speed mixing that introduces excessive air bubbles compromise structural integrity. Always measure components precisely and mix at recommended speeds below 600 RPM.
Application thickness affects drying uniformity and final appearance. Excessively thick layers trap solvents and air, creating bubbles, uneven colour, and extended cure times. Multiple thin coats outperform single thick applications for appearance and durability.
Premature use damages uncured epoxy permanently. Walking on surfaces before initial set compresses the coating, whilst vehicle traffic before full cure creates permanent tyre marks or indentations. Respect minimum cure times despite pressure to resume normal activities.
- Peeling or blistering: Strip failed sections, improve surface prep, retest moisture, and reapply
- Soft or tacky spots: Remove uncured material, verify mixing ratios, apply fresh properly mixed epoxy
- Bubbles in finish: Use proper application speed, avoid high-speed mixing, apply thinner coats
- Uneven colour or texture: Maintain consistent roller pressure, work quickly within pot life, ensure thorough mixing
- Premature wear: Allow full 7-day cure before heavy traffic, consider protective topcoat
DIY epoxy troubleshooting resources help identify and correct issues before they become permanent failures. Most problems prove correctable through proper diagnosis and remedial techniques.
Expected results, maintenance, and longevity
Properly installed epoxy flooring delivers 7-10 years of service in residential and commercial Gold Coast applications. Industrial settings with heavy equipment or chemical exposure may require more frequent maintenance or recoating, whilst residential garages often exceed expected lifespans with minimal care.
Appearance remains attractive throughout the floor’s life when basic maintenance practices are followed. The seamless, non-porous surface resists staining from oils, chemicals, and common contaminants. Scratches and scuffs appear less readily than on painted concrete or other coating systems.
Regular cleaning maintains appearance and extends lifespan. Sweep or vacuum frequently to remove abrasive grit that causes micro-scratches over time. Mop with mild detergents diluted in water, avoiding harsh chemicals or acidic cleaners that degrade the epoxy matrix. Pressure washing works well for heavily soiled surfaces but use moderate pressure to avoid coating damage.
Protective measures prevent premature wear. Place mats under workbenches or heavy equipment to distribute loads. Use furniture pads under wheeled items to prevent point loading. Wipe up chemical spills promptly even though epoxy resists most common substances.
- Sweep or vacuum regularly to remove abrasive particles
- Mop with mild detergent solutions, avoiding harsh chemicals
- Inspect periodically for cracks, chips, or worn areas requiring attention
- Recoat high-traffic zones every 3-5 years to maintain appearance
- Address damage promptly before it spreads to surrounding areas
Epoxy floor lifespan and care information helps you maximise your investment through appropriate maintenance schedules and protective practices tailored to your specific usage patterns.
Discover expert epoxy flooring solutions with Floor X Industries
Whilst DIY application suits many projects, professional expertise ensures optimal results for complex installations or high-value properties. Floor X Industries delivers specialised epoxy floor coating services throughout the Gold Coast, combining proven techniques with premium materials for residential and commercial applications.

The Hyper Flake Stone Range showcases stunning decorative finishes that transform ordinary concrete into distinctive design elements. Professional concrete polishing solutions prepare substrates correctly whilst offering alternative finishing options for properties seeking different aesthetics. Expert guidance helps you select appropriate systems, avoid costly mistakes, and achieve results that enhance property value through durable, attractive flooring solutions.
Frequently asked questions
Can I apply epoxy flooring myself on the Gold Coast?
Yes, DIY epoxy application succeeds when you follow proper preparation steps, use correct tools, and adhere to manufacturer specifications. Test concrete moisture levels below 4%, ensure thorough surface cleaning, and maintain appropriate ambient temperatures throughout application and curing. This guide provides the comprehensive framework needed for successful self-installation.
How long does it take for epoxy flooring to cure fully?
Initial surface hardening allowing light foot traffic occurs within 12-24 hours under optimal conditions. However, full chemical cure developing maximum hardness, chemical resistance, and durability requires approximately 7 days. Avoid heavy traffic or vehicle use during this period to prevent permanent damage to the developing coating matrix.
What safety equipment should I use during epoxy application?
Wear respirators with organic vapour cartridges to protect against chemical fumes throughout mixing and application. Nitrile gloves prevent skin contact with resin and hardener components. Safety goggles shield eyes from splashes during pouring or mixing. Ensure adequate workspace ventilation through open windows and exhaust fans to remove airborne contaminants effectively.
How can I test my concrete moisture content before applying epoxy?
Use a digital concrete moisture meter available from hardware stores to test multiple floor locations. Moisture must measure below 4% to prevent adhesion failures. Test near walls, plumbing fixtures, and exterior doors where moisture intrusion occurs most frequently. The overnight plastic sheet test provides additional verification by revealing condensation that indicates excessive moisture levels requiring further drying time.


