

TL;DR:
- Queensland’s climate requires moisture-tested, UV-stable epoxy systems for durable garage floors.
- Proper surface preparation, including grinding and termination cuts, ensures epoxy adhesion and longevity.
- Using high-quality, UV-resistant topcoats prevents yellowing, chalking, and hot tire pickup issues.
Queensland’s heat, humidity, and heavy vehicle traffic combine to wear down garage floors faster than most homeowners expect. Concrete that looked fine a few years ago can develop cracks, staining, and surface dusting that make your garage look neglected. Epoxy resurfacing solves all of this in one project, creating a surface that resists moisture, UV exposure, chemical spills, and daily tyre scuffing. This guide walks you through every stage of the process, from assessing your slab to applying the final topcoat, with practical advice tailored specifically to Queensland’s challenging climate conditions.
Table of Contents
- Assessing your garage floor and planning the resurfacing
- Gathering tools and materials for epoxy resurfacing
- Step-by-step process for resurfacing garage floors
- Troubleshooting and avoiding common mistakes
- The Queensland advantage: Lessons from years of garage floor upgrades
- Take your garage floor to the next level with expert solutions
- Frequently asked questions
Key Takeaways
| Point | Details |
|---|---|
| Moisture testing is critical | Testing for moisture vapour ensures your epoxy coating lasts, especially in Queensland’s humid climate. |
| Choose UV-stable topcoats | UV-stable finishes prevent yellowing and protect your garage floors from Queensland’s sunlight. |
| Quality epoxy prevents hot tire pickup | Investing in premium epoxy systems minimises surface damage from tyres and daily use. |
| Proper preparation avoids common errors | Careful cleaning, grinding, and cutting ensure professional results and reduce troubleshooting later. |
| Local expertise makes a difference | Following Queensland-specific advice leads to longer lasting and better-looking garage floors. |
Assessing your garage floor and planning the resurfacing
Before you purchase a single litre of epoxy, you need to understand what you’re working with. A thorough assessment now prevents costly failures later. Start by walking the entire slab and noting any cracks, spalling (surface flaking), oil staining, or areas where the concrete feels hollow underfoot. Hollow spots often indicate delamination beneath the surface, which must be repaired before any coating goes down.
Moisture is the single biggest threat to epoxy adhesion in Queensland. Queensland’s humid climate demands moisture testing and moisture-tolerant primers before any resurfacing work begins. The simplest test is the plastic sheet method: tape a 600mm x 600mm piece of clear plastic to the slab, seal all edges, and leave it for 24 hours. Condensation forming on the underside confirms active moisture vapour transmission. If moisture is present, you’ll need a moisture-tolerant primer as your base layer rather than a standard epoxy primer.
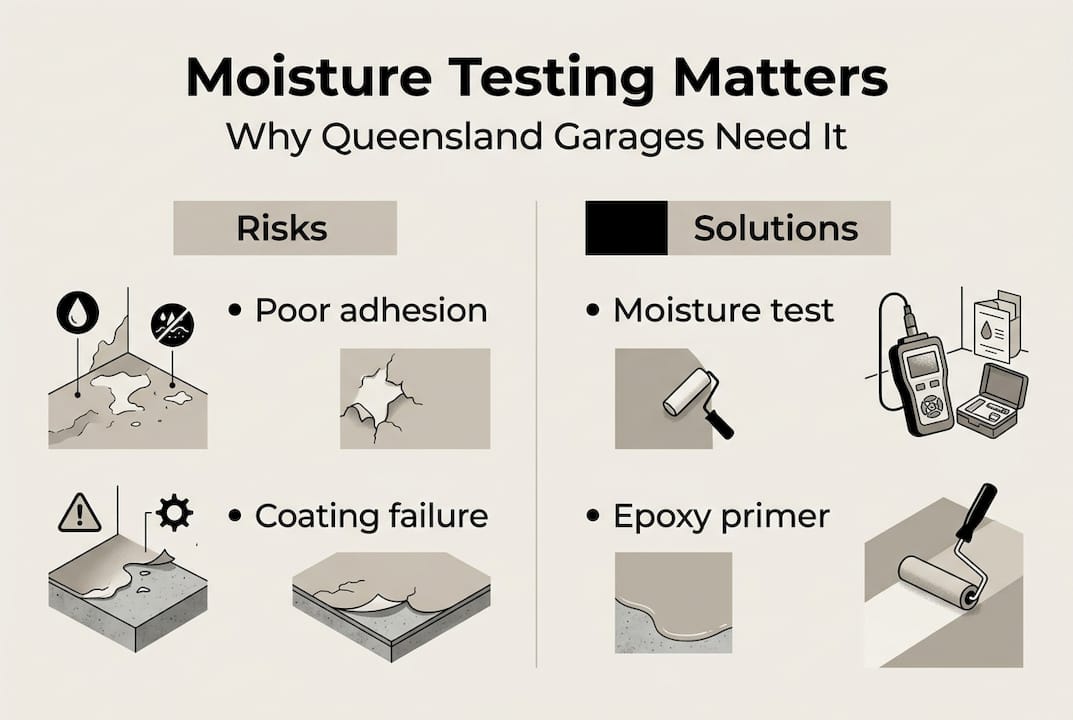
Choosing the right epoxy floor coatings system for Queensland means prioritising two properties: moisture tolerance and UV stability. Standard epoxy resins yellow and chalk under prolonged UV exposure, which is unavoidable in Queensland garages that receive direct afternoon sun. Pair a moisture-tolerant primer with a UV-stable polyurethane or polyaspartic topcoat to protect your investment.
Planning your termination cuts is another step many homeowners overlook. A termination cut is a shallow saw cut made in the concrete near the garage door opening. It gives the epoxy coating a defined, clean edge to terminate against, preventing peeling or chipping at the most vulnerable point of the floor. Plan this cut before grinding begins.
Here’s a quick comparison of surface conditions and the appropriate response:
| Surface condition | Assessment result | Recommended action |
|---|---|---|
| Minor surface cracks | Stable, hairline only | Fill with epoxy filler, proceed |
| Active moisture vapour | Moisture present | Use moisture-tolerant primer |
| Oil staining | Contaminated surface | Degrease and grind thoroughly |
| Hollow or spalling areas | Structural concern | Repair with concrete patching compound |
| Poorly cured concrete | Weak surface | Do not coat; seek professional advice |
Key checks before you commit to resurfacing:
- Cracks: Fill hairline cracks with a flexible epoxy filler before grinding
- Moisture: Complete the plastic sheet test on multiple areas of the slab
- Surface strength: Scratch the surface with a key; powdery residue means weak concrete
- Contamination: Look for oil, paint, or sealers that will block adhesion
- Drainage: Confirm the slab has adequate fall toward the door opening
Pro Tip: Never resurface a wet slab. If rain has entered the garage recently, allow at least 48 to 72 hours of dry weather before proceeding. Coating over a damp slab almost always leads to adhesion failure within weeks. For more planning guidance, explore our DIY epoxy upgrades resource.
Gathering tools and materials for epoxy resurfacing
Once you’ve determined your floor needs and the right products, let’s make sure you have everything required for the job. Arriving at application day without the correct equipment is one of the most common reasons DIY projects stall or fail.
Essential tools:
- Angle grinder with diamond cup wheel or hired floor grinder for larger areas
- Industrial vacuum with HEPA filtration to manage concrete dust
- Squeegee and notched roller for epoxy application
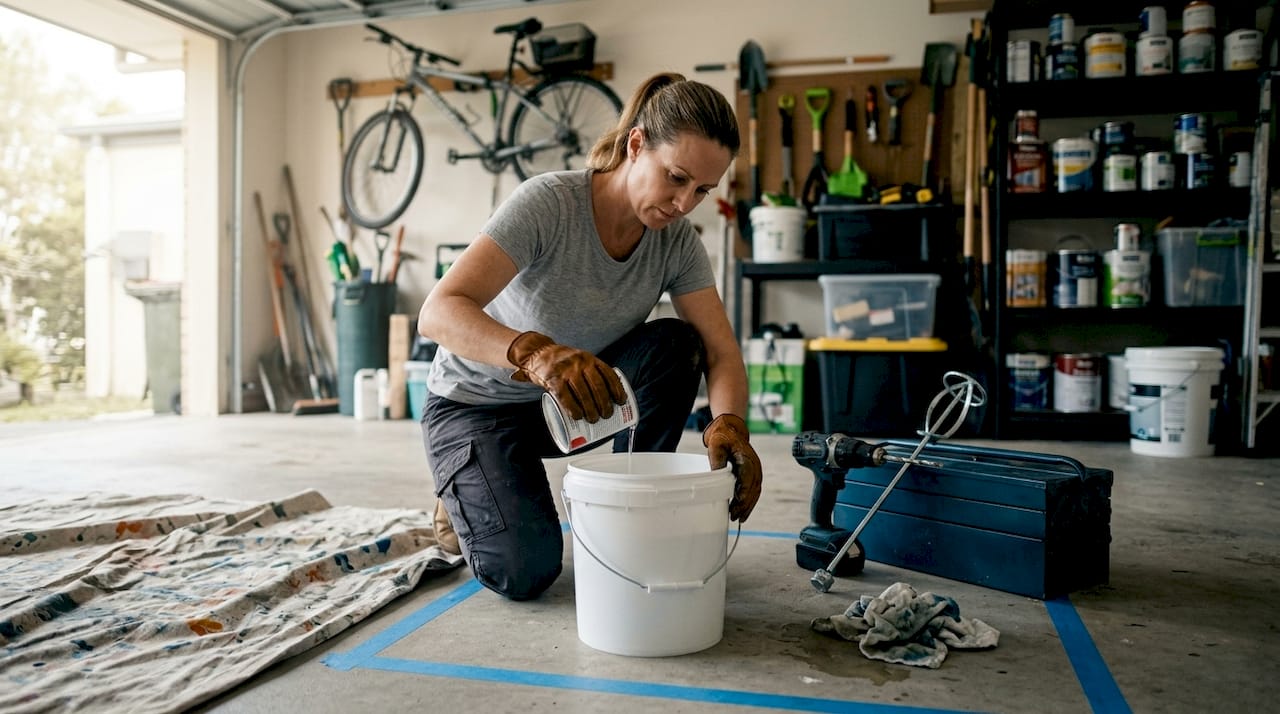
- Mixing paddle and drill for two-part epoxy components
- Paintbrush for cutting in edges and corners
- Spike roller to release air bubbles from the wet coating
- Plastic sheeting and masking tape for protecting walls and door frames
Materials checklist:
| Item | Purpose | Queensland-specific note |
|---|---|---|
| Moisture-tolerant primer | Seals slab, promotes adhesion | Essential in humid conditions |
| Two-part epoxy base coat | Main protective layer | Choose high-solids formulation |
| UV-stable topcoat | Surface protection, gloss finish | Prevents yellowing from sun exposure |
| Epoxy crack filler | Repairs surface defects | Apply before grinding |
| Decorative flakes (optional) | Aesthetic texture and grip | Broadcast into wet base coat |
| Metallic additives (optional) | Premium visual effect | See metallic epoxy garage floors for inspiration |
For decorative options, decorative flake epoxy garage floors show what’s achievable with broadcast flake systems in a residential setting.
Safety gear (non-negotiable):
- Chemical-resistant gloves
- P2 respirator mask rated for organic vapours
- Safety glasses or goggles
- Knee pads for application work
- Closed-toe footwear with chemical resistance
Pro Tip: Moisture-tolerant primers and UV-stable topcoats are strongly recommended for Queensland conditions. Skimping on topcoat quality is the leading cause of hot tire pickup, which is when warm rubber tyres bond to the epoxy surface and peel it away when the vehicle moves. Quality materials and proper curing time are your best defence. For further garage epoxy coating advice, independent resources can help you verify product specifications before purchasing.
Step-by-step process for resurfacing garage floors
With your tools and materials at the ready, you’re prepared to follow the detailed steps for a Queensland-proof epoxy floor. Work through each stage in sequence and resist the urge to rush curing times, especially in humid weather.
Clean the slab thoroughly. Remove all oil, grease, and debris using a commercial degreaser. Scrub stubborn stains with a stiff brush, rinse well, and allow the slab to dry completely.
Grind the surface. Use a diamond cup wheel grinder to open the concrete pores and create a Concrete Surface Profile (CSP) of at least CSP 2 to 3. This mechanical roughening is what allows epoxy to bond correctly. Vacuum all dust with HEPA filtration.
Complete moisture testing. Run the plastic sheet test as described earlier. If moisture is confirmed, apply your moisture-tolerant primer and allow it to cure fully per the manufacturer’s specification.
Make termination cuts. Saw cut a clean line near the garage door threshold before applying any coating. This protects the edge of your finished floor from lifting.
Apply the primer coat. Mix the two-part primer thoroughly and apply with a squeegee and roller. Work from the back of the garage toward the door. Allow full cure before proceeding.
Apply the epoxy base coat. Mix the two-part epoxy base coat and apply evenly. For solid colour epoxy floors, one coat is typically sufficient. Broadcast decorative flakes into the wet coat immediately if using them.
Apply the UV-stable topcoat. Once the base coat has cured, apply your UV-stable polyurethane or polyaspartic floor coatings topcoat. This layer provides the final gloss, durability, and UV resistance your Queensland garage needs.
Allow full curing. Light foot traffic is usually possible after 24 hours, but vehicle traffic should wait at least 72 hours. Full chemical cure takes up to seven days.
Safety warning: Epoxy coatings release volatile organic compounds (VOCs) during application and curing. Always ensure adequate cross-ventilation by opening garage doors and windows. Use your P2 respirator throughout application and for at least one hour after completing each coat.
Pro Tip: Apply epoxy early in the morning during Queensland summers. Afternoon heat can accelerate the pot life of mixed epoxy, reducing your working time and increasing the risk of an uneven finish. For additional guidance, the DIY application guide covers timing and temperature considerations in detail. As a general rule, avoid resurfacing wet slabs or concrete showing signs of hydrostatic pressure, as the coating will not bond reliably.
Troubleshooting and avoiding common mistakes
Even with careful preparation and application, some common setbacks can arise. Here’s how to recognise and fix them before they become permanent problems.
Common issues to watch for:
- Poor adhesion or peeling: Almost always caused by insufficient surface preparation or moisture beneath the slab. Grinding must reach bare, clean concrete before any primer is applied.
- Bubbling or pinholes: Caused by air escaping from porous concrete during application. Use a spike roller immediately after laying each coat to release trapped air.
- Premature yellowing: A sign the topcoat lacks UV stability. Replace with a UV-stable polyurethane or polyaspartic product before the next coat.
- Edge peeling near the door: Indicates termination cuts were not made, or the epoxy was feathered too thin at the edge. Saw cut and re-coat the affected zone.
- Uneven sheen or lap marks: Result of inconsistent roller pressure or working in direct sunlight. Apply in shaded, consistent conditions.
Humidity management is critical in Queensland. High ambient humidity during application can cause amine blush, which is a waxy film that forms on the epoxy surface as it cures. This film prevents topcoat adhesion. If you notice a greasy or chalky film after the base coat cures, wash it off with warm water and a mild detergent before applying the next layer.
Hot tire pickup can be mitigated by using quality epoxy systems with a hard-wearing topcoat. Cheap single-part epoxy paints are particularly vulnerable to this problem. If pickup has already occurred, the affected area must be mechanically abraded and re-coated with a commercial-grade two-part system. For a full breakdown of the garage epoxy benefits that quality systems deliver, including resistance to chemicals and thermal cycling, our resources provide a detailed overview.
| Problem | Likely cause | Solution |
|---|---|---|
| Peeling or delamination | Moisture or poor prep | Grind back, re-prime, re-coat |
| Bubbling or pinholes | Porous concrete, trapped air | Spike roller during application |
| Yellowing | UV exposure, no UV topcoat | Apply UV-stable topcoat |
| Hot tire pickup | Low-quality epoxy, under-cured | Re-coat with commercial-grade system |
| Amine blush film | High humidity during cure | Wash surface, re-coat when dry |
For further troubleshooting garage epoxy issues, independent guides offer product-neutral advice that complements your preparation work.
The Queensland advantage: Lessons from years of garage floor upgrades
After working on garage floors across South East Queensland for over a decade, we’ve seen a clear pattern: projects that skip moisture testing or use generic epoxy products rarely last more than two to three years before showing signs of failure. The Queensland climate is simply not forgiving of shortcuts.
The most important lesson we’ve learnt is that UV-stable topcoats are not optional here. They are the difference between a floor that looks great for a decade and one that yellows and chalks within eighteen months. We’ve also found that homeowners who invest in proper surface grinding, rather than acid etching alone, consistently achieve stronger adhesion and longer-lasting results.
Our experience with stylish epoxy coatings across Queensland homes confirms that the right product selection, combined with climate-aware application timing, produces results that genuinely add value to a property. Don’t let a one-day shortcut cost you a full re-do in two years.
Take your garage floor to the next level with expert solutions
If you’re ready for a flawless result and lasting durability, professional epoxy flooring services and project inspiration will make your next step easier.

Exploring our full range of epoxy floor coatings gives you a clear picture of what’s achievable for your specific garage. Whether you’re drawn to the depth and movement of metallic epoxy inspiration or the practical grip and texture of decorative flake designs, our portfolio covers a wide range of finishes suited to Queensland homes. We offer professional site assessments to help you choose the right system and ensure your slab is ready for a coating that lasts.
Frequently asked questions
Do I need to test for moisture before applying epoxy in Queensland?
Yes, moisture testing is essential in Queensland due to the state’s high ambient humidity. Moisture testing before application is critical, and a moisture-tolerant primer should be used if any vapour transmission is detected.
What causes garage epoxy floors to yellow and how can I prevent it?
Yellowing is caused by UV radiation breaking down standard epoxy resins over time. UV-stable topcoats avoid epoxy yellowing and are essential for any Queensland garage that receives direct sunlight.
How can I avoid hot tire pickup after resurfacing my garage floor?
Quality epoxy and correct curing are the most reliable prevention. Allow at least 72 hours before parking vehicles and always use a commercial-grade two-part system rather than single-part epoxy paint.
What are termination cuts and why are they important in garage resurfacing?
Termination cuts are shallow saw cuts made in the concrete near the garage door opening. They give the epoxy coating a defined edge to finish against, preventing peeling and chipping at the most exposed part of the floor.
Can I apply epoxy over damaged or poorly cured concrete?
Epoxy should not be applied over damaged or poorly cured slabs. Avoid resurfacing poor concrete or wet slabs, as the coating will not bond correctly and will fail prematurely regardless of product quality.


